Slack notification with SNS and Lambda


Introduction
Cloud notifications are messages cloud computing platforms use to communicate important information to their users. These notifications let users quickly respond to critical events or issues within a cloud service.
They provide users with information about service quality, reliability, and availability. For example, a cloud storage service may notify a user when a backup is complete or fails. Such a notification creates awareness about the safety of the user's data or the need to address a problem.
In this article, I will explain how to send your cloud notifications to Slack with AWS SNS and Lambda Functions.
Create Slack WebHook
To create a Slack webhook, follow these steps:
- Sign in to your Slack account and select the workspace where you want to create the webhook.
- Go to the Slack API website and click on the "Create a Slack App" button.
- Give your app a name and select the workspace where you want to install it. Click "Create App".
- On the next page, scroll down to the "Add features and functionality" section and click on "Incoming Webhooks".
- Activate the Incoming Webhooks feature by setting the toggle to "On". Then click on the "Add New Webhook to Workspace" button.
- Select the channel where you want to send the webhook messages and click "Authorize".
- You will be taken back to the Incoming Webhooks page. Scroll down to the "Webhook URLs for Your Workspace" section and copy the webhook URL.
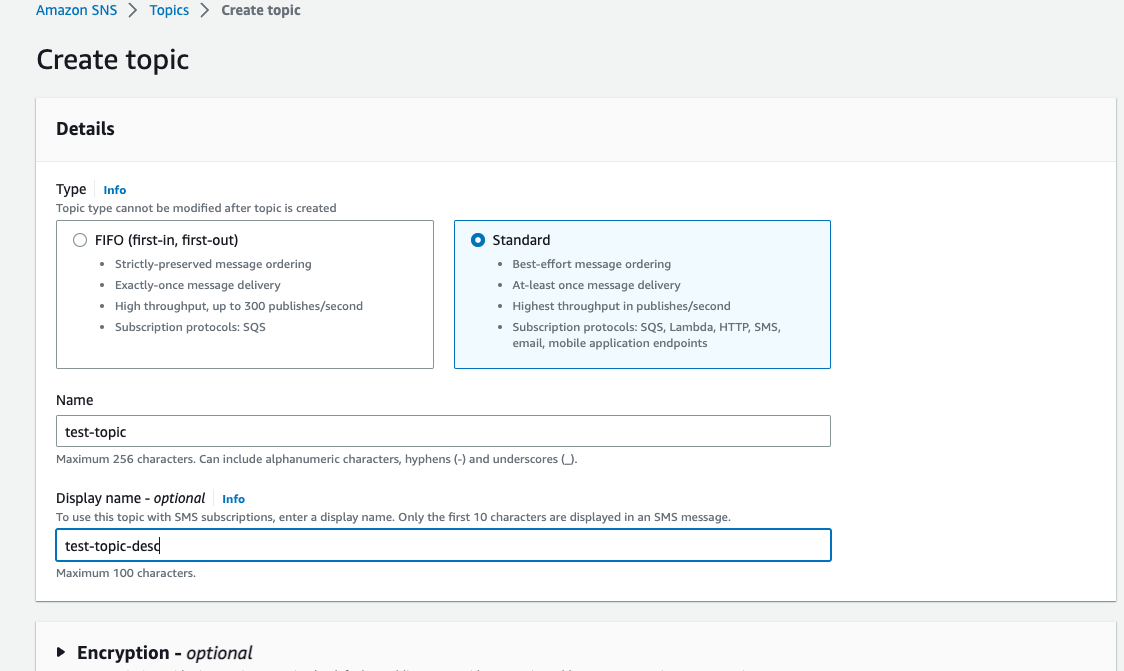
Create SNS Topic
We start the process by opening a topic in the SNS service, where we will collect notifications. After opening the SNS Dashboard, we click the Create Topic button. In the next screen, we need to populate the following options.
- Standard
- Topic name
leave others with the default options and press the Create Topic button.
Create Function
In order to consume SNS topic messages, we need to write a simple function and connect it with the previously created topic.
Create a basic Python function with the following code block:
import urllib3
import json
http = urllib3.PoolManager()
def lambda_handler(event, context):
    url = "previously copied webhook url"
    msg = {
        "text": event['Records'][0]['Sns']['Message']
    }

    encoded_msg = json.dumps(msg).encode('utf-8')
    resp = http.request('POST',url, body=encoded_msg)
    print({
        "message": event['Records'][0]['Sns']['Message'],
        "status_code": resp.status,
        "response": resp.data
    })
Add Trigger to the Function
Click the configuration tab on the Lambda Function and Select Trigger menu item. Press Add Trigger button then select the previously created topic from the SNS service.
Test the Notifications
There is one last setting you need to make to listen to events with the SNS service. Whatever events you want to listen to, we must go to the relevant service and ensure that the events are sent to the topic we created earlier.
I assume you have an ElastiCache cluster. Press modify button, scroll to the bottom of the page and choose your topic from the Topic for Amazon SNS notification section. Thats it. You will now receive notifications on Slack whenever there is a change in your ElastiCache cluster.
You can do this step in any of the supported AWS services!
Conclusion
In this article, I have covered simple notification producing/consuming with the AWS SNS service and Lambda function. Thanks to Slack, we now have a dedicated notification service.
See you in the next article. 👻


