Media Transcoding with AWS Lambda + Elastic Transcoding

Intro
Transcoding is taking encoded video decompressing it and altering and re-compressing it.
For example, video for a live broadcast can be transcoded from its original format into differently formatted streams to be delivered to the largest number of viewers on the widest range of devices.
Transcoding is a digital-to-digital conversion of one type of encoded data to another, often because the target device that will be used to display the content requires a smaller file size.
Media transcoding is a time-consuming task that requires follow-up. If you are dealing with media conversion works in your projects, this article is for you!
What if I told you you could automate video resolutions with a Lambda function? Let's quickly get to the point.
Solution
We can reach the solution by sending the event that occurs when we upload our raw video file to the s3 bucket, to the lambda function, trigger the elastic transcoder pipeline and write the output to an output s3 bucket.

Elastic Transcoding Presets
To start the transcoding process, you need to choose one or more of the presets in the AWS Transcoding service or create your own preset. I will not go into the details of presets in this article. It will be enough to select 1 predefined preset and writes down the ID.

Elastic Transcoding Pipeline
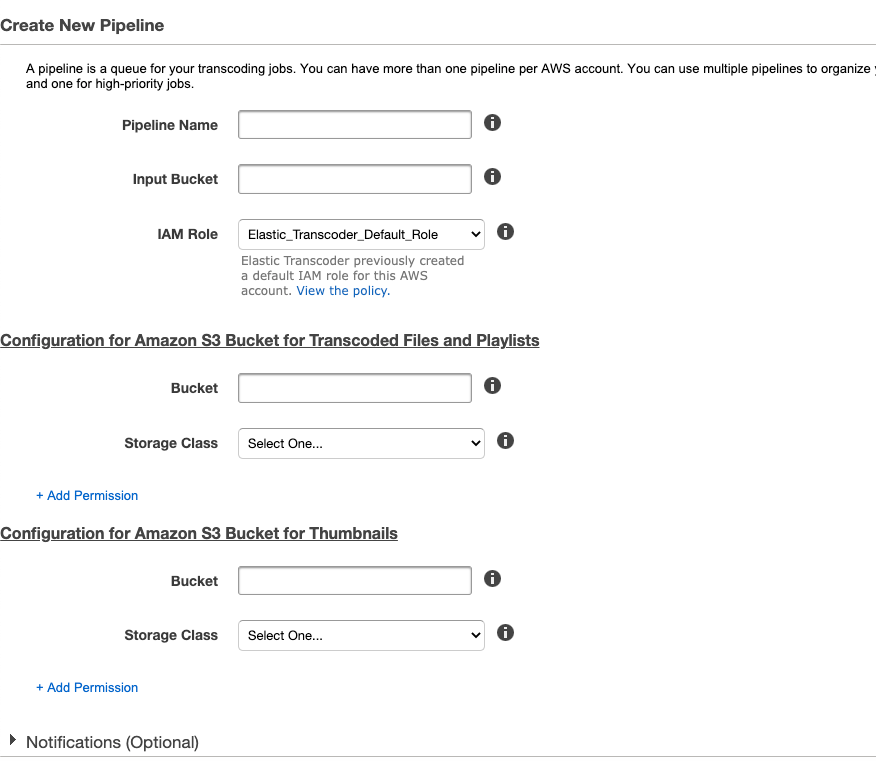
We need to create a pipeline to run the preset we have chosen or created. Thanks to this pipeline, we can define input buckets and output buckets, select a storage class, and create notifications. After we fill in the fields, we need to write down created pipeline ID.

Writing the Lambda Function with Java
Create a basic spring boot project with the following dependencies, extract the tar file and open it via your favourite IDE.
curl -G https://start.spring.io/starter.tgz \
-d dependencies=devtools,lombok,web \
-d type=maven-project \
-d language=java \
-d platformVersion=2.7.10 \
-d jvmVersion=17 \
-d groupId=dev.habil \
-d packaging=jar \
-d artifactId=elastic-transcoder \
-d name=elastic-transcoder \
-d description=Demo%20project%20for%20Spring%20Boot \
-d packageName=dev.habil.transcoder \
-d baseDir=lambda-elastic-transcoder | tar -xzvf -
Add required 3party dependencies
Add required maven plugins & configurations
Let's create a configuration class for AWS Elastic Transcoder.
Now, we need to create a service class
Time for the Function class
Here is the Request Object
Change SpringApplication to FunctionalSpringApplication
Local Test
You can test in the local environment by creating a "controller" for testing and connecting to the service.
Package The Function & Deploy
Let's package our function. Open a terminal while in our function root directory and execute the following maven command.
mvn clean packageNow we packaged our function, at this point, you have to choose your deployment strategy. You have
- "jar" deploy with AWS Console
- Create and upload with aws-cli
- Create a container, push it to the ECR and create lambda deploy options.
For the sake of simplicity, I'll deploy my function via AWS Console.
Open AWS Console and follow the steps
- Create Function
- Choose "Author from scratch"
- Give the function a name
- Choose Runtime "java11"
- Create Function.
Now you need to upload your jar file. To get started click the "Upload From" button, select zip or jar file and start uploading.
After setup your function General Configuration settings (I chose 512MB Ram and 30s timeout), you have one last configuration to do.
When you are "Code" tab, edit runtime settings and update handler input with this line.
org.springframework.cloud.function.adapter.aws.FunctionInvoker::handleRequestThats all! You may trigger your function with the Test tab.
Result
We have a fully automated media transcoding pipeline. You may integrate it into your application, pipeline or whatever you need.
See you in the next article.
The source code can be found here:
