How to set up K3S on Raspberry Pi


Intro
K3s is a highly available, certified Kubernetes distribution designed for production workloads in unattended, resource-constrained, remote locations or inside IoT appliances.
K3s is packaged as a single <40MB binary that reduces the dependencies and steps needed to install, run and auto-update a production Kubernetes cluster.
Both ARM64 and ARMv7 are supported with binaries and multi-arch images are available for both. K3s works great from something as small as a Raspberry Pi to an AWS a1.4xlarge 32GiB server. Click for more details.
Requirements
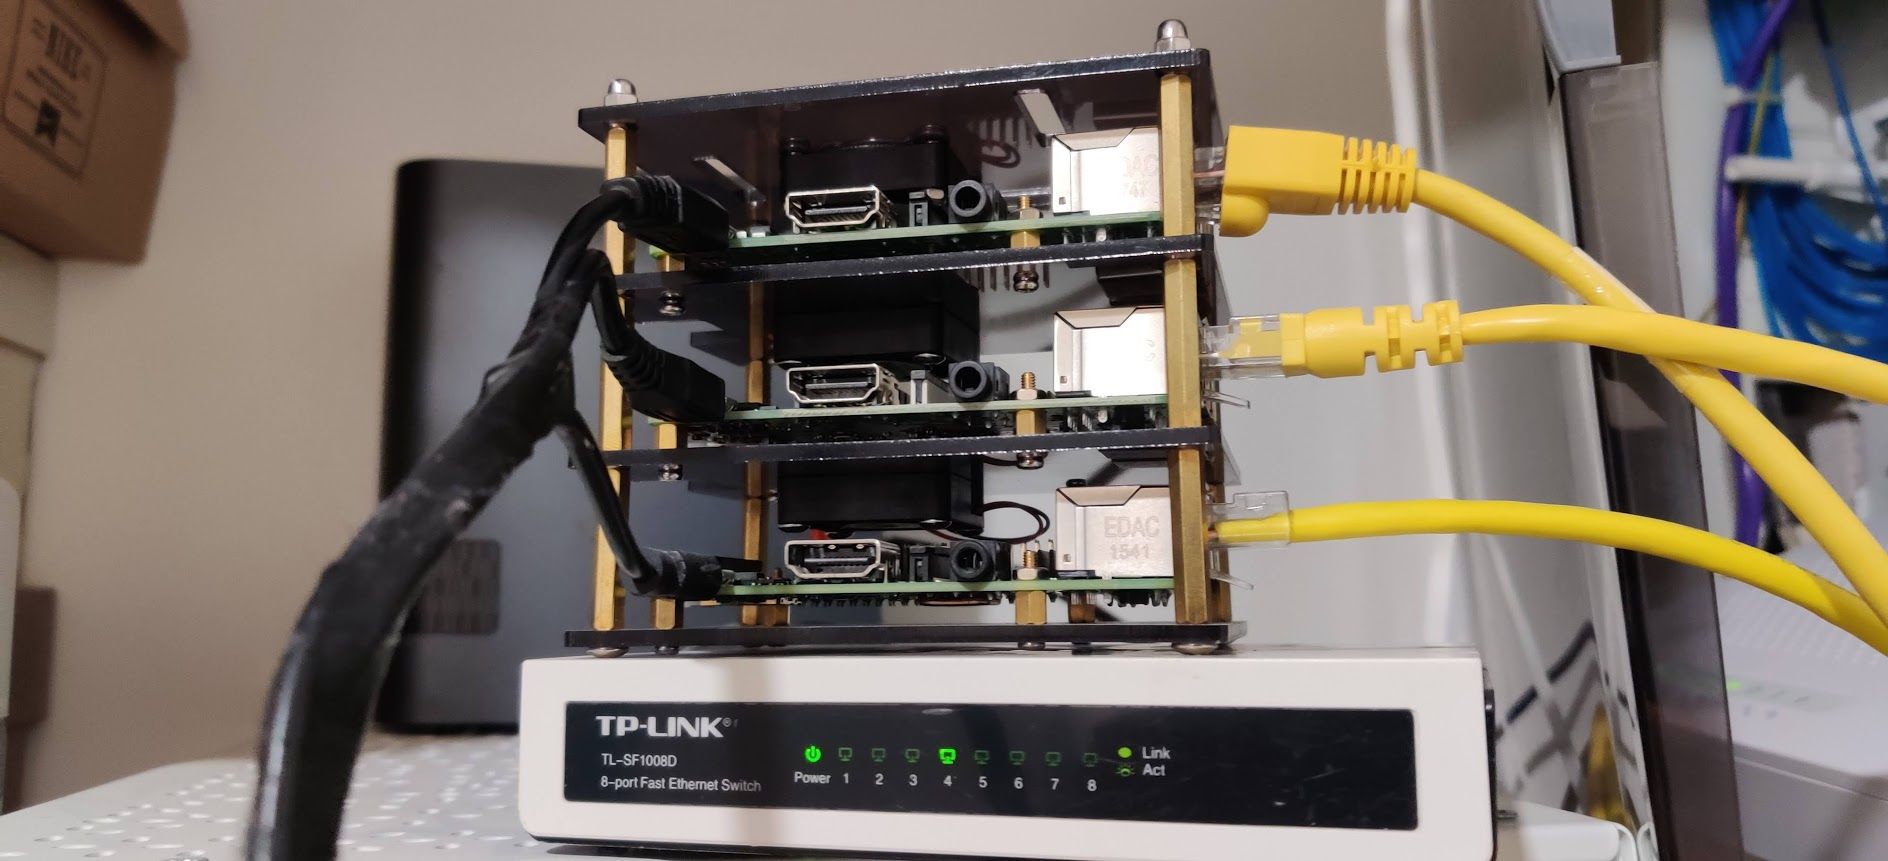
I tested this setup with my old RP3s. If you have unused RP's, you can try them too. If not, here is the shopping list;
- At least 2 of Raspberry Pi 2B/3B/3B+/4 (RP-4: https://amzn.to/3oWSruA / RP-3: https://amzn.to/365K1Zp)
- Sandisk Ultra 64GB MicroSDXC card: https://amzn.to/389iqZL
- I preferred to connect with 8 port switch for the low latency. https://amzn.to/2IpOZZ8
- Power adapter 5V 2.5A https://amzn.to/35ZIROQ or multi-adapter https://amzn.to/32dx6mQ
- Cat7 cable https://amzn.to/2TZIazq
- Cluster case (Optional) https://amzn.to/3mSXw5p
Flashing the OS
There are many options when you want to flash OS to a USB drive. In this setup, I preferred Raspberry Pi Imager. Download the latest version of Raspberry Pi Imager and install it.
First is first, don't forget to format your sd card. Open Raspberry Pi Imager and choose the Raspbian lite from the list presented and click ‘WRITE’ to begin writing data to the SD card.
After the flashing, add a text file named "ssh" in the boot partition.
In macOS;
sudo touch /Volumes/boot/sshSetup of the Raspberry Pi
To connect to RP;
ssh [email protected]When asked to enter a password, type "raspberry". (RP default password).
To config our RP;
sudo raspi-config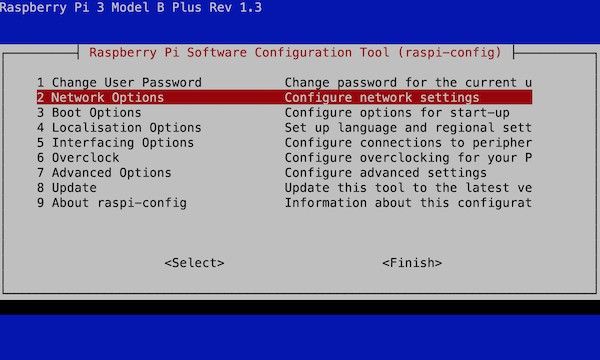
At this point, you need to decide how you connect your cluster/nodes after installation. Password or SSH key? I'll go with a password but I strongly recommend using SSH.
After changing the default password, you may want need to change the hostname and IP addresses. To assign a static IP address to RP, we need to edit dhcpcd.conf file;
sudo nano /etc/dhcpcd.confand;
interface eth0
static ip_address=192.168.0.4/24
static routers=192.168.0.1
static domain_name_servers=192.168.0.1
Enabling Container Feature
To enable this feature, you need to edit the cmdline.txt file with your favourite editor.
sudo nano /boot/cmdline.txtAdd this line to the top.
cgroup_enable=cpuset cgroup_memory=1 cgroup_enable=memoryAfter this step, you need to apply the same changes to the other RPs.
K3S Setup
All we need is 1 line script.
curl -sfL https://get.k3s.io | sh -To check the current k3s service status;
sudo systemctl status k3s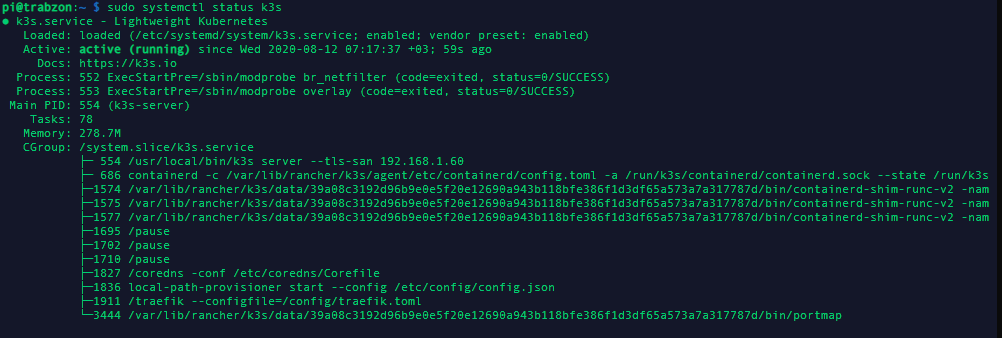
Worker Nodes
In order the connect worker nodes to the master, we need a token. To get to the token;
sudo cat /var/lib/rancher/k3s/server/node-tokenDon't forget to save your token in a safe place, we'll use it later.
Finally, run this snippet to connect your worker node to the master node;
- masternode: your master node IP address.
- token: previously grabbed the token
sudo curl -sfL https://get.k3s.io | K3S_URL=”https://masternode:6443” K3S_TOKEN=token sh -To check nodes;
sudo k3s kubectl get nodes
The End
We completed K3s cluster installation on RP's. Feel free to discover your newly created homemade K3s cluster.
Here is my cluster's final picture;